Showing posts with label Photography. Show all posts

Sunday, 22 March 2015

Photography Workshop- 18th March

This was our last photography workshop and today we were looking at printing. Beytan asked us to bring up two prints; one from the studio lighting task, and one from the five images task.


He explained to us the printing process, and how we were going to achieve the result we wanted. He also went through colour calibration manually and with a hardware calibrator in order to allow us to see our images as closely to what was going to be printed as possible.

In order to prepare our images for print, we firstly had to look at our proof setup to ensure it was simulating the right color space and set our rendering intent:


Once we had chosen this, we could then add a sharpening filter if we chose to do so.


With the sharpening filters, you can choose high pass, which will sharpen according to a set radius on a moveable bar. The result is a light sharpen if you choose a small radius such as 1.5 shown here. However I found that I would like it to be sharpened more, and so I chose to use mexican hat sharpening which involves physically putting the values in, however it is mathematically correct in the way it sharpens the image.


Without Mexican Hat


With Mexican Hat

This is an extreme view, and it is much more subtle when looking at the image as a whole, however for me it greatly improved the overall look of the image.

Now we could start to setup our print settings to match the paper, colour profile, printer, rendering intent, and 

The most important thing here was to make sure that photoshop was managing the colours so that the colours would be accurate to what I see on the screen, and to make sure that the rendering intent, and paper are the same as what I am using to get an accurate result.

Once I had made my first print, I placed it on the keyboard with the image on the screen so that I could compare them and determine whether my print was successful.


Wednesday, 18 February 2015

Photography Workshop- 17th February

Yesterday we had a studio session attempting to teach us some essential skills for lighting a subject and using studio equipment to potentially enable me to get photography work in the future should I so wish to do so. The main focus today was narrow and broad lighting. This technique is used in much of portrait photography to either enhance features to create a more aesthetically pleasing image, or to bring out character in the face.

We started by looking at some narrow and broad lighting examples:


This example of narrow lighting shows how it highlights the cheekbones and brings attention to the neckline, and the light in the eyes makes the subject look more aesthetically pleasing.


This example of broad lighting shows how this highlights the features as a whole a lot more, rather than lining them with shadow, which brings out more character in the face as a result.

Then we tried to take our photograph examples of narrow and broad lighting:


Narrow Lighting


Broad Lighting

Now that we had gotten to grips with this, we started looking at this type of lighting in context to classical paintings. We firstly looked at broad lighting used by Rembrandt:


Rembrandt was a Dutch painter that used broad lighting in a similar way in most of his commissioned portraits. This is so that he could have consistency across his works, making him much more likely to be hired as the client knew what they would be getting, and it also allowed him to capture the character of the person in the painting. This style of broad lighting not only casts a shadow on one side of the face, but also catches the light in both eyes as they look towards the frame. We were given the task of using one light to achieve this effect:


This effect took a while to get absolutely right, this included having to move the subject and the light around to get the right balance between the two. What I noticed was essential to this photograph was that the subject could not face directly towards the character as that is quite commercial, but also quite imposing. 

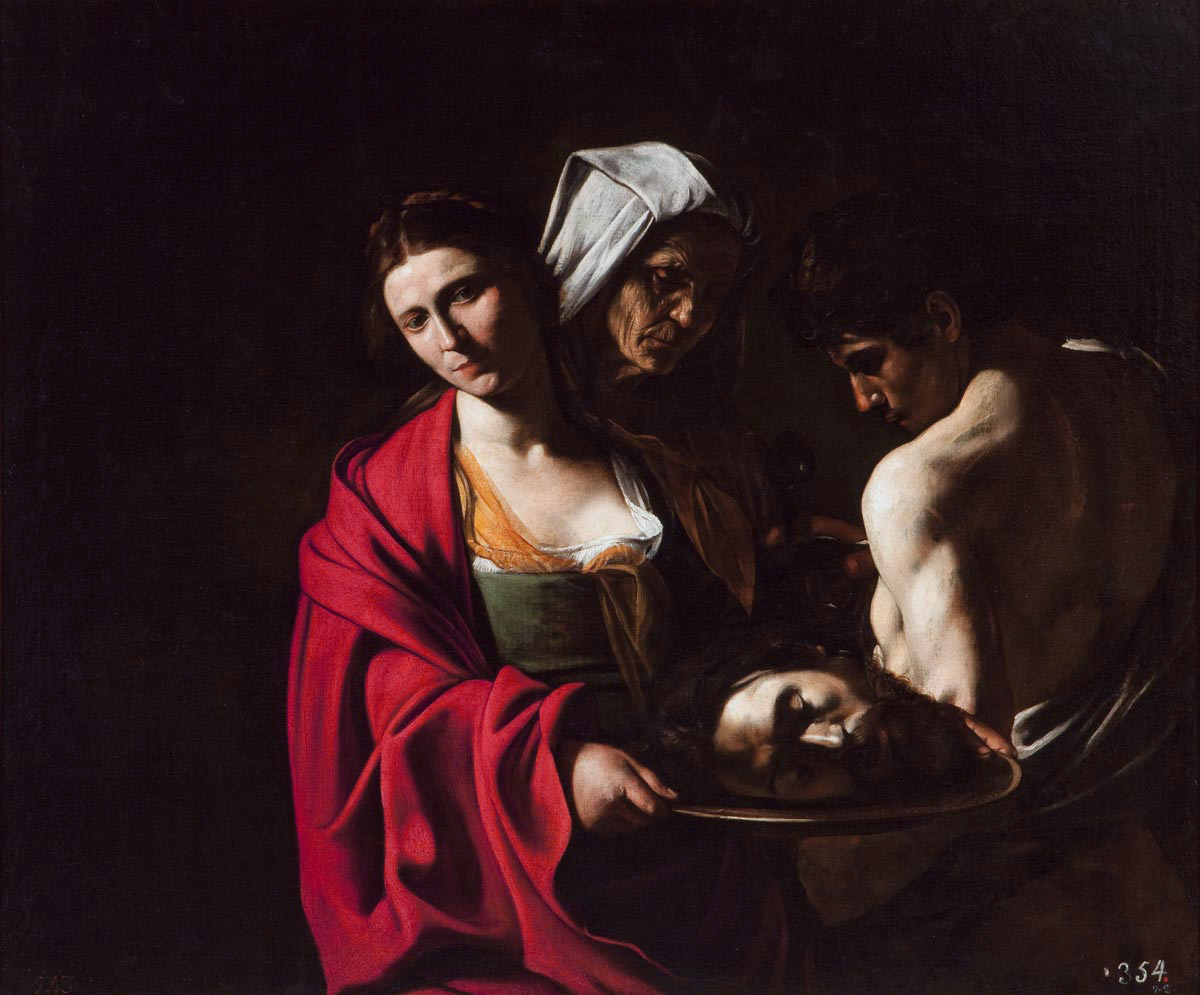
The second style we looked at was the style of Caravaggio, who was a Renaissance painter commissioned by the church to create many depictions of biblical stories. He used narrow lighting from a high position to create heavy shadows in his scenes, which makes the image very dramatic.


We then had a go with a couple of photography students who had kindly volunteered to model for us:


The main thing I discovered about this style of lighting is that using the shadows to your advantage was very important. I loved how, especially in the first picture, you could highlight facial expressions really easily and get a twinkle in the eye which I feel fits with the biblical style of painting.


Sunday, 8 February 2015

First Photography Workshop- The RAW File and Using Smart Objects

This first photography workshop began by covering the use of RAW file in photography, and how we can use it to push our photographs even further in post-production. We talked about the use of jpegs vs the use of raw files, and then we were told to go and take some photographs in jpeg and raw in order to try and work with both in photoshop and see what our results would be.

We were told to try and use adjustment layers to recover our photographs in jpeg, which were purposefully shot using the wrong light balance settings. This was the result:


Although this is slightly better than the original image, the blue of the tungsten lighting setting really shows through. Also the darks are far too dark.

When we started editing our photographs in Photoshop, we were confronted by the camera Raw menu: 


This was explained to us as almost like being back behind the camera again. You can change your white balance settings, and many other features in order to improve the look of your photograph. The lecturer told us to use the histogram to see how much information we are getting, and what we are doing to our photographs when we change certain settings.


This second image, which was edited using camera raw in Photoshop shows a staggering difference between the two, and demonstrates clearly how much better shooting in Raw is, compared with jpeg.


Tuesday, 14 January 2014

Fashuuun

I've always found it fascinating how my own styles in clothing change. All throughout my life I've actually been able to observe the changes, without even attempting to stop it. Self-reflection has always been something I'm good at. Most recently my sense of colour has changed, along with my longing for practicality in my clothes. I no longer want to spend £20 on a bunch of stuff from Primark as it doesn't last 5 minutes in the real world. Maybe that's a maturity thing, I don't know but I've definitely noticed. I also have a love of the old.

So, to memorialise my fashion sense now, with the purpose of being able to make a comparison in the future, I tried to mimick fashion photography, especially in the style of a website I found called http://lookbook.nu/, which gather styles from all over the world and capture something I enjoy wearing a lot.